Showing posts with label dessert. Show all posts
February 21, 2014
Book Club Bites: The Paris Wife
This is the beginning of a new series! Once a month I'm going to write a post about a book perfect to discuss at your book club and match it to a recipe. Sometimes it will be a book I read for my own local book club and sometimes it will just be a book I think would make for great discussion. I'm going to include a link to discussion questions, and other books to read for more information or to continue the theme.
I'm really excited to start with The Paris Wife by Paula McClain, which just happens to be my real life book club's pick for February. This is the story of Ernest Hemingway's early years in Paris as he was beginning his career, told through his first wife Hadley. They had a whirlwind courtship in the United States before heading abroad as newlyweds. They became part of the circle of intellectual ex-pats living in Paris they socialize with F. Scott Fitzgerald, Gertrude Stein and Ezra Pound (among others). McClain brings their relationship through it's complete arc with respect and intimacy. It's heartbreaking to watch each of them struggle with their values and sense of self as they navigate their troubled marriage.
The first thing I did when I finished this book was run to my computer and Google Hadley Hemingway. I needed to see a picture of her and find out what happened after the end of the book. Being inspired to find out more about a subject is one of my favorite parts of historical fiction. I added two books to my reading list after I finished The Paris Wife. The first was Paris Without End by Gioia Diliberto, the non-fiction story of Hadley and Ernest's marriage and the second was A Moveable Feast by Hemingway himself. This was the last book he wrote before his death and he finally tells the tale of those early years in his own words.
To get your own discussion started here is a list of book club questions from Random House.
Now on to what food to serve at your book club for The Paris Wife. I wanted something French, since the city of Paris is almost more character than setting, but I needed to keep it simple. I looked through cookbooks, decided to make a dessert (because, well…dessert!) and then began debating what fit best with the book. Crepes are lovely but more complex than either Hadley or I would be capable of. Then I stumbled on Clafloutis. It is a simple dish- a little bit cake, a little bit custard. It reminded me of the contrast between Hadley and flashy Jazz Age Paris. This is simple and unpretentious.
It is traditionally made with cherries but I wanted to experiment a little. It was the perfect excuse to use the end of last summer's rhubarb in my freezer, something I am very stingy about! I can't wait to try more variations as different fruit and vegetables come into season. The leftovers will be perfect the morning after book club with your coffee!
Rhubarb Clafoutis
adapted from Mastering the Art of French Cooking by Julia Child, Louisette Bertholle and Simone Beck
Ingredients:
3 cups chopped rhubarb (about 1 inch pieces)
1/4 cup sugar
1/2 cup flour
pinch salt
3 eggs
1/3 cup sugar
1 tsp vanilla extract
1 cup milk
In a saucepan (oven proof preferable) place the rhubarb and sugar and cook over medium-low heat until the rhubarb begins to caramelize-about 10-15 minutes.
In a mixing bowl whisk together the dry ingredients. Add the eggs and whisk until combined. Then pour in the milk and vanilla and stir until completely combined. It will be a very loose batter so don't panic.
Take the rhubarb off the heat and let it cool for 2-3 minutes. Pour the batter over the fruit. Bake in the oven for 50-55 minutes. It is done when a cake tester comes out clean and the cake has browned slightly. It will fall a little as it cools and just before serving dust with powdered sugar. Serve warm.
February 13, 2014
10 Favorite Desserts for Valentine's Day
Do you have plans for Valentine's Day tomorrow? It will be a quiet night in for us. I'll make a pizza and we'll settle in for a movie with the kids. Dinner out on Valentine's day is always extra crowded, extra expensive and extra overwhelming for me. Maybe we'll open a good bottle of wine from our days in Napa once the kids are in bed and rent a movie we've been wanting to see, but chances are I'll be dozing off on the couch by 9. And in this season of life, I really wouldn't have it any other way.
The boys will be off from school tomorrow and since they are still excited about holidays I'll make a special dessert and maybe we'll spend the day making some homemade decorations. They are so ernest when they create things right now and I love watching it. My oldest will take his time so everything in his picture is just how he wants it, and my youngest will patiently explain every piece of his creation to me when he realizes that my grownup mind is too serious to recognize what exactly the Ninja is doing in his picture. Even five years into motherhood I am blown away by how one word or look from them can make my heart stop in wonder for a second.
In case you're still looking for something to make this Valentine's Day, I've rounded up 10 of my favorite desserts for a little inspiration! Several are no-bake or require very little effort and all of them will make any day a little more special.
Will you be celebrating tomorrow? Do you go prefer to go out or stay in?
The boys will be off from school tomorrow and since they are still excited about holidays I'll make a special dessert and maybe we'll spend the day making some homemade decorations. They are so ernest when they create things right now and I love watching it. My oldest will take his time so everything in his picture is just how he wants it, and my youngest will patiently explain every piece of his creation to me when he realizes that my grownup mind is too serious to recognize what exactly the Ninja is doing in his picture. Even five years into motherhood I am blown away by how one word or look from them can make my heart stop in wonder for a second.
In case you're still looking for something to make this Valentine's Day, I've rounded up 10 of my favorite desserts for a little inspiration! Several are no-bake or require very little effort and all of them will make any day a little more special.
Will you be celebrating tomorrow? Do you go prefer to go out or stay in?
December 17, 2013
Gingerbread
I had a moment of panic this morning when I realized that Christmas is the beginning of next week not the end. Which means as soon as I hit "publish" on this post I will be in a whirlwind of wrapping followed by standing in giant lines with other panicked people at the UPS store and/or Post Office. Yikes. Someday, we'll be back on the east coast near family and I will be able to finish my shopping on the 24th like I prefer to :)
Yes, I wrote all my papers the night before they were due in college and grad school too.
This gingerbread is a winter favorite. It's a bit sticky and the flavor is stronger than other recipes due to the fresh ginger in it. I love to wrap this up as gifts, serve it for dessert around the holidays and eat it for breakfast with a cup of tea. I'll keep making it until the weather warms up in the spring too! It's too good to keep around for only a month every year.
Are you a last minute shopper/baker/shipper too?
Gingerbread
adapted from Nigella Christmas
1 stick plus 3 tbsp unsalted butter
3/4 cup dark corn syrup
3/4 cup molasses
2/3 cup packed brown sugar
1 tsp ground ginger
2 tsp grated fresh ginger
1 tsp ground cinnamon
1/4 tsp ground cloves
1 tsp baking soda dissolved in 2 tbsp warm water
1 cup milk
2 eggs, beaten
2 cups all purpose flour
Preheat oven to 350 degrees. Line a baking dish with parchment paper and butter or nonstick spray the sides of the pan.
Over medium heat, melt the butter, sugar, syrup, molasses, and spices in a saucepan until they are combined.
Off the heat add in the milk, eggs and baking soda dissolved in water.
Pour the flour into a large bowl, and add in the liquid ingredients mixture. Beat the mixture until totally mixed together-make sure to watch out for flour clumps. Don't panic that the batter is too liquid either-it's supposed to be.
Pour the batter into the pan and bake for 45-50 minutes. Cool in the pan before slicing and sprinkling with powdered sugar if you'd like.
December 12, 2013
Flourless Chocolate Orange Cake
I promised you chocolate, didn't I? Sorry it had to get bumped a day but Christmas preparations reared their ugly head yesterday and I had to make an emergency trip to civilization to pick something up before it sold out. Combine that with our usual round of after school speech therapy, homework, piano practice, etc. and I was one tired Mama last night. I don't know about you, but sometimes the amount of effort it takes to make the holidays magical for the boys sure takes the magic out of it for us grownups. By the end of the day, I was ready to snuggle in with a warm drink, a good book (Cuckoo's Calling) and a piece of this chocolate cake out of the freezer.
I first made this cake verbatim from Nigella Kitchen a few years ago for my husbands birthday and it was all I wanted it to be. Relatively quick, delicious and event worthy. So I continued to make every now and then without fiddling with the recipe much. When Thanksgiving rolled around this year, I decided we needed a second dessert to balance out the Apple Pie, and my husband suggested chocolate. I knew I couldn't commit to the extra time needed for frosting and making a big layer cake like I did for Christmas last year, and finally I remembered this cake.
Of course we didn't have a lime in the house and there was no way I was going to Walmart the day before Thanksgiving! Not a chance. We did have oranges though, and I remembered a friend raving about a chocolate-orange loaf cake she had made a while back…and really, what good is having family around if you can't force them to be guinea pigs for your culinary experiments?
I love the orange flavor in this much more than the lime. It retained the same rich and decadent flavor and the same slightly gooey center but the orange notes really make it feel special. The original recipe calls for a flavored whipped cream on top, but I prefer it with a big scoop of ice cream. It was the perfect end to an already over the top meal, and it also just happens to be the perfect snack out of the fridge or freezer after a long day. There's a good reason that every episode of Nigella's TV series ends with her sneaking into the kitchen for leftovers after everyone else has gone to bed!
Linking up with The SITS Girls Saturday Sharefest! Lots of great links to check out :)
Flourless Chocolate Orange Cake
adapted from Nigella Kitchen
Ingredients:
6 oz bittersweet chocolate, roughly chopped
1 1/2 sticks unsalted butter, room temperature
6 eggs
1 1/4 cup superfine sugar (if you can't find this, just put regular sugar into the food processor for a few seconds)
1 cup almond meal or flour
4 tbsp unsweetened cocoa powder, sifted
zest and juice of one small orange
confectioner's sugar to dust the top (optional)
Preheat oven to 350 degrees. Line a 9 inch springform pan with parchment paper and coat bottom and sides with non-stick spray or butter.
In a metal or glass bowl set on top of a small saucepan filled with boiling water, melt the chocolate and butter together, stirring regularly. Set aside to cool a little.
With a mixer (standing or hand-held), beat the eggs and sugar until they triple in size. In another bowl, mix the almond flour and cocoa powder together and then fold into the egg mixture. Once combined, fold in the melted chocolate and butter, and then the orange zest and juice.
Pour into the pan, and bake for 40-45 minutes. It will be firm and crust-like on the top, but underneath it will still be gooey in the center. Cool on a wire rack, and after about 5 minutes drape a clean tea towel over it to prevent the crust from getting too crunchy. You want it to crack a little though, so don't panic.
Dust with confectioner's sugar once it is totally cooled and serve with whipped cream or ice cream if you wish.
October 3, 2013
Biscoff Fudge
I was going to save this recipe until next week but after eating pretty much the whole container in the last 48 hours I decided it wasn't very nice to make you wait for it. When I first discovered Biscoff I made what became my favorite cookie recipe and I didn't bother to try any other recipes because I had the one. Earlier this week I planned on making those cookies, but I was out of oats. Since we're in the midst of this lovely government shutdown, the commissary is closed and I just couldn't bear to go to Walmart at lunchtime. Ugh. The craziness there makes my head spin.
So I dug around a little bit until I found some other recipes that used Biscoff and then found this fudge. SCORE. Like the cookies, it's no bake, and comes together in a matter of minutes. It tastes just like you'd expect-a more solid, portable form of the spread. That's pretty awesome for those of us who could eat Biscoff by the spoonful out of the jar. It's sweet and a little bit rich, but that didn't stop us from eating most of the batch in one sitting!
Somehow I don't think the leftovers will make it through the rest of today.
Biscoff Fudge
adapted from Sugarcrafter
Ingredients:
1 cup unsalted butter (2 sticks)
1 cup biscoff
pinch of salt
1 tsp vanilla extract
3 cups powdered sugar, sifted
Prep an 8x8 pan by lining it with a piece of parchment paper or aluminum foil. Cut the piece so that some hangs over the edges of the pan. (This will make it easier to list the fudge out of the pan.) Spray the paper/foil with a nonstick spray and set aside.
Melt butter and biscoff in a saucepan together over medium heat, stirring continuously. Once completely smooth, add in the vanilla and salt. Slowly pour in the powdered sugar, mixing as you go. Once it is totally incorporated, pour the mixture into the prepared pan. Smooth the surface with a knife or the back of a spoon.
Put the pan in the fridge to cool until firm. Cut into bite size pieces and serve!
September 17, 2013
Brown Sugar Oatmeal Cookies
Ever had one of those days where your to do list is so long that you want to throw it out and just make cookies?
Yeah. That was yesterday for me. Between soccer practice, kids homework, trying to start running again, welcoming new spouses to the squadron, attempting to keep Mt. Laundry in check, and prepping for a visit from family (yay!) I might have over-scheduled myself just a wee bit this week. It's all stuff I want to do...I just need to be better at organizing it on my calendar so it's not all at the same time. Whoops! As I get older, I'm realizing that when I feel overwhelmed, the best thing I can do is take a breather. I'm embracing the fact that I can have coffee with a friend or take some down time in the kitchen or with a book and the rest of that to-do list doesn't look so scary.
If you are in need of last minute cookies these are definitely the way to go. They took all of 10 minutes to put together and another 15 to bake up. The ingredients are all things that I had in the house and there is no fancy footwork once the dough is made-you just spoon it onto the baking sheet and pop it in the oven. I love how the brown sugar created a deeper flavor than a regular sugar cookie, and the oatmeal adds a nice texture. I took some out at about 14 minutes and some out just a few minutes longer to try them soft and crunchy. Fab both ways...but the crunchy ones taste really good dunked in your afternoon tea :)
Brown Sugar Oatmeal Cookies
barely adapted from The Pioneer Woman Cooks
Ingredients:
1 cup unsalted butter, softened
2 cups packed brown sugar
1 tbsp vanilla extract
2 eggs
1 1/2 cups flour
1 tsp salt
1/2 tsp baking soda
3 cups old fashioned oats
Preheat oven to 350.
Cream the butter and sugar together in the bowl of a stand mixer (or use your hand mixer). Once it is pale and creamy add in the vanilla, then the eggs (one at a time), scraping the bowl and mixing until totally combined after each addition.
In another bowl, whisk together the flour, salt and baking soda. Add into the butter mixture in 3 batches, mixing each until just combined. Add the oats in and mix those until just barely combined as well.
Scoop out a tablespoon of dough for each cookie and drop on a cookie sheet a few inches apart. Keep an eye on the cookies starting at about 13 minutes. If you like them a little crispier, go to 15-16 minutes.
September 9, 2013
Apple Slab Pie
I had never heard of a slab pie until earlier this summer. I was totally intrigued by the idea and started digging around to find more. The regular pie shape does not lend itself well to picnics or potlucks. The slab pie works perfectly though. You can cut it up in advance so people can serve themselves and you could even eat it without utensils in a pinch. It also has the distinct advantage of a higher crust vs. filling ratio for those of us who really like pie crust-especially the part that's all gooey from the filling.
I used the pie crust recipe that I fell in love with last week (find it here) and just rolled it out to fit a jelly roll pan. It took me a while to get it to the right dimensions, and had I not already prepped that pan I would have seriously considered switching to a smaller one. It was a bit of a pain, but I'm so glad I persevered. The crust was flakey and delicate and was a perfect match for my grandmother's apple pie recipe. Naturally everyone prefers their own family recipe, but I really do love the play of this blend of spices with a fresh fall apple.
It might also taste really good with a cup of tea for breakfast. Any dessert I'm still thinking about the next morning is a winner in my book :)
My Grandmother's Apple Pie Filling:
6 cups Apples, roughly chopped
3/4 cup sugar
1/2 tsp cinnamon
1/4 tsp nutmeg
2- tbsp clearjel powder, flour or tapioca
1 tbsp butter, chopped into small pieces
Enough of your favorite pie crust recipe to cover a double pie. (Here's my go-to recipe)
Preheat oven to 400 degrees.
Mix all the ingredients except butter in a large bowl and let sit while you roll out the crust. For a traditional round pie, roll into 2 circles about 1/8 in thick and 2 inches larger than your pie plate. For a slab pie, roll into a rectangle about 1/8 in thick and 1-2 inches larger than the pan. (Unless you are really comfortable rolling out pie dough, I would start with a 9x9 or 10x13 pan)
Once the bottom layer of crust is in the dish pour the fruit mixture in. Dot the butter over the mixture and then cover with the top crust and seal the edge. Cut several slits in the crust and bake for 45-50 minutes when the crust is crisp and slightly browned. (The slab pie version will be done on the earlier end and a traditional pie will be slightly longer. Check around 40 and watch the top for browning.)
Just for fun, I drizzled a little caramel sauce I had in the fridge over the pie. It was a yummy bonus, but don't go buying or making caramel for such a little drizzle.
August 19, 2013
Apple Cobbler
You want to know how easy this recipe is? This is one of the first things I learned how to make on my own when I was a kid. For some reason I had gotten hooked on the Frugal Gourmet show and my grandmother gave me this cookbook for Christmas one year. Somewhere along the line we tried this cobbler and it was such a hit that we just kept making it and making it. My Dad was always roped in to peel the apples since he could take the peel off in one continuous piece-which is a talent guaranteed to make you a hit with young children.
Once you get the apples chopped there's a little bit of sautéing and mixing and you're good to go. The butter in the baking dish makes the outside crisp up just a little and then the inside is a delicious mix of fruit and cake. The consistency almost reminds me of a gooey cake-it's set just enough to be considered a cake.
Let's just say that we made this for a dinner with friends last night and there was just enough left for me to photograph this morning...and then I promptly ate the leftovers. My only regret is there isn't any left to have with my tea this afternoon.
Apple Cobbler
adapted from The Frugal Gourmet Cooks American by Jeff Smith
Ingredients:
2 pounds apples, peeled and roughly chopped
1 stick butter, divided in half (each half should be 1/4 cup)
1 1/4 cup sugar
1/2 tsp cinnamon
1/4 tsp nutmeg
1 cup flour
2 tsp baking powder
1 tsp salt
1/2 cup milk
Melt 1/4 cup of the butter and set aside.
Begin to melt the other 1/4 cup butter and then add in the apples. Sauté the apples until they begin to get soft. Add 1/4 cup sugar, cinnamon and nutmeg.
Mix flour, baking powder, salt and the rest of the sugar together. Stir in the milk until completely combined.
Pour the melted butter that you set aside into the bottom of 9x9 baking pan or similar/medium sized casserole dish (a slightly larger rectangular pan will work too, but start checking it at about 40 minutes instead of 50). Pour the batter on top of the butter and spread in an even layer. Then pour the apple mixture on top of that and make sure that covers the batter.
Bake for 50 minutes at 350 degrees. Serve warm or room temperature.
August 8, 2013
Lemon Sorbet
Even though schools are starting up again, I still have a little time to sneak in some last gasp summer recipes. The zest makes the lemon flavor stand out while the sugar balances the natural tartness. It works really well at the end of a cookout when you just don't want anything really heavy, or on one of these crazy hot days where you just can't bear the idea of turning on your oven.
The downside? If you happen to make it on one of those really hot days it's going to melt. Fast. Even faster if you're attempting to take pictures of it in the sun for good lighting...so fast that you might spill it all over the kitchen floor and your favorite sandals. Ahhh, the joys of being a klutz and a food blogger :) At least it was my shoes and not my camera, right?
Lemon Sorbet
adapted from Sweet Pea's Kitchen
1 1/4 cup sugar
2 tsp lemon zest
1/2 cup lemon juice (about 3 lemons)
1 1/2 cups water
pinch salt
1 tbsp limoncello (or vodka-this will just keep it from freezing too hard)
Heat all ingredients gently in a pan on the stovetop until the sugar is dissolved and the mixture is smooth. Pour into a bowl and place in fridge or freezer until completely cold. Place into ice cream maker and process following manufaturer's instructions. The sorbet will look more like soft serve than ice cream at this point. You can eat it immediately, but I prefer to freeze it for another hour or two until it is more solid. Works better in a cone that way :)
July 8, 2013
Snickerdoodle Gooey cake
I had never heard of gooey cakes until last year. They started popping up in my blog reader and the combination of cake base topped with a sticky, buttery topping caught my eye. It wasn't until I was flipping through the Smitten Kitchen cookbook looking for a dessert to take to a potluck that I found a version that I had to make immediately. Deb's recipes tend to have that affect on me.
The thing that sticks out about this gooey cake is the topping. Cinnamon and sugar forms a thin crust over the creamy center, reminiscent of a creme brûlée. Cinnamon and sugar are not fancy flavors-they remind me more of a favorite breakfast (cinnamon-sugar sprinkled over hot, buttered toast) than they do of a fancy dessert.
The cake cuts into bars and ends up being perfect for toting along to an event. It feeds a crowd and is something different than everything else on the table. 'Tis the season for barbecues, picnics, and potlucks. This won't disappoint, and there won't be any leftovers either!
Snickerdoodle Gooey Cake
adapted from The Smitten Kitchen Cookbook, by Deb Perelman
Ingredients:
For the base:
1 stick unsalted butter, softened
1 1/2 cups all purpose flour
1 tsp cream of tartar
1/2 tsp baking soda
pinch of salt
3/4 sugar
1 egg
1/4 cup milk
For the gooey layer:
1/4 cup honey (or light corn syrup)
1/4 cup milk
1 tbsp vanilla extract
1 1/2 sticks butter, softened
1 cup plus 2 tbsp sugar
1 egg
1 1/4 cup all purpose flour
For the topping:
2 tbsp sugar
1 1/2 tsp ground cinnamon
Preheat the oven to 350 degrees. Prep a 9x13 pan by lining it with parchment paper and spraying with a nonstick spray.
For the base:
Beat the butter and sugar with an electric mixer or stand mixer until the color lightens. Pour in the milk and the egg and mix until combined.
Whisk together the dry ingredients (flour, cream of tartar, baking soda, salt) and then add into the wet ingredients. Beat until just mixed together.
Pour the dough into the pan and spread out until bottom of pan is covered. Put aside.
For the gooey layer:
Back in the mixer, beat the butter and sugar together. Add in the egg and mix until combined, scraping down the sides of bowl when needed. Whisk together the honey, milk and vanilla. Pour in 1/3 of the flour and mix until just combined. Add in 1/2 the honey mixture and do the same. Repeat until all the flour and honey mixture have been mixed in. Careful not to overmix here. Pour over the base layer and spread until evenly covering it.
For the topping:
Mix the cinnamon and sugar together and pour in an even layer over the entire cake.
Bake for 25 minutes. The gooey layer will still be, well, gooey under the topping. Cool for a few minutes in the pan and then lift out using the parchment paper and cool completely on a cooling rack. Once cool, cut into bars.
July 2, 2013
Strawberry Icebox Cake
One of my favorite about the military life is having friends all over the country. It's especially fun this time of year as I watch the end of the school year announcements pour in. Here in Oklahoma we are already halfway through summer since our school year ended in May, but my friends in New England (where I grew up) just got out a week or two ago. Every time I open up Facebook I feel a twinge of jealousy at all the pictures of the beach and sailboats!
It occurred to me this year that the end of school seems to be tied with the beginning of strawberry season. Our Oklahoma strawberries peaked in late May/early June. Up in New England though the berries are still in full swing, just as the kids are getting out of school. Maybe that is why I love to see the fresh strawberries begin to appear in the garden and on the grocery store shelves. They are the first real harbinger of summer. They epitomize the bright, fresh feeling I have at the start of the season. Of course, the summer I love is really the New England or San Francisco summer, where you are still wearing sweaters and jeans half the time. Summer in the Great Plains, with 100+ degree days and no clouds is taking some getting used to.
This icebox cake is perfect for the beginning of summer. The flavor of the strawberries is front and center, with a dash of lemon to enhance them even more. Alternating layers of strawberries, whipped cream and graham crackers turn into a light and refreshing dessert after sitting overnight in the fridge. The whole thing is assembled in less than 20 minutes and can be made ahead. An added bonus for those of us in the middle of the heatwave? No oven required.
No-Bake Strawberry Icebox Cake
adapted from The Kitchn
Ingredients:
2 pounds strawberries
4 cups heavy whipping cream
1/2 c confectioners sugar
zest of one lemon
1 tsp vanilla
4 sleeves graham crackers
Wash, hull and thinly slice the strawberries. Put the cream, sugar, lemon zest, and vanilla into the bowl of a stand mixer (or a regular bowl to use a hand mixer). Place the bowl of ingredients and the whisk attachment to the mixer into the fridge for about 10 minutes. Once they've chilled a little bit, whisk the mixture until stiff peaks form.
Place a few spoonfuls of whipped cream on the bottom of a 9x13 pan. Place 6 graham crackers on the bottom of the pan and then cover with a real layer of whipped cream. Then cover the whipped cream with the sliced strawberries. Do this 3 more times until you have four layers total of the graham crackers. Cover the top with whipped cream and one last layer of strawberries.
Refrigerate for at least 4-6 hours, but overnight is even better. Serve cold.
June 24, 2013
Lavender Lemon Bars
I don't really subscribe to the idea that desserts have their seasons. I will happily eat gingerbread in the summer and ice cream in the winter. Every once in a while though I make something that just feels right for a particular moment in the year. These lemon bars epitomize a summer dessert for me. The lemon is crisp and refreshing, while the lavender adds a depth of flavor to set it apart. The lavender is in the crust and sprinkled on top so that it won't detract from the lemon, only enhance it.
I served these at a book club event as well as a backyard barbecue and they were equally at home at both. Summer calls for recipes that can do double duty, don't you think? already brainstorming different ways to use these two flavors together again. Lemonade? Lemon cake? Lemon drop martini's sweetened with a lavender simple syrup? You'll probably be seeing more of this combination this summer!
Lavender Lemon Bars
adapted from the Joy the Baker Cookbook by Joy Wilson
Ingredients:
Crust:
2 sticks softened unsalted butter
3/4 c sugar
1/4 c brown sugar
2 c flour
pinch of salt
3/4 teaspoon dried lavender
Filling:
4 eggs
1 1/2 c sugar
6 tbsp flour
juice of 3 lemons (approximately 1/2 cup)
1 tbsp lemon zest
Topping:
powdered sugar
dried lavender
Preheat oven to 350 degrees. Prep 9x13 inch pan by spraying with non-stick spray or coating in butter.
For the crust:
Mix together butter and sugars in a stand mixer with a paddle attachment. Within a few minutes the mix should be light in color and fluffy. Scrape down the sides of the bowl and add in the flour, salt and lavender. Mix until just combined and then finish mixing using a spatula. Pour into pan and push the dough into the bottom using your fingers to create an even crust. Beware of any uneven sections because those might show through the filling. Bake crust for 20 minutes until it browns slightly.
For the filling:
Whisk eggs and sugar together until light in color. Add in the rest of the filling ingredients and whisk until completely combined.
Take the crust out of the oven and pour in filling mixture right away. Pop it back into the oven for another 25 minutes (check at 20 if you have a hot oven, but mine needed the full 25). It should be slightly brown around the edges no longer wobbly in the center.
Cool in pan. Cut into slices and sprinkle with powered sugar and dried lavender. Store in airtight container in the fridge.
June 19, 2013
Biscoff No-Bake Cookies
Baking for me is grounding. Rough day with the kids or the Air Force? (or more likely both!?) Give me 15 minutes in the kitchen with Mumford and Sons on and I can start to shake the day off. A few more minutes of whisking or listening to the whir of my mixer and by the time the dishes are done I can breathe again. It's a way of bringing my focus into one single thing, like focusing on your breath while meditating.
I think that's the same reason I read so much historical fiction. If the story and the writing are right, I can escape into a world completely unlike my own and come out refreshed on the other side.
I had one of those days today. So into my kitchen I went and in 15 minutes plus dishes, these went into my fridge. I can breathe again and face the tomorrow with my reserve filled back up.
No bake cookies have many fine qualities, but beauty is not one of them. Luckily, this particular variety is so addicting no one seems to mind. This is the kind of cookie that will brighten your day, or someone else's. They are sweet, but not so decadent that you can't have two. They're easy, fast, and freeze divinely. What's not to love? I have been known to polish off half of a batch before I can force myself to give the rest away.
Luckily I have my lovely book club friends to help me eat these tomorrow night. We are reading my favorite book in the world, Persuasion, and I like to think Jane might approve of these...
Biscoff No-Bake Cookies
slightly adapted from Brown Eyed Baker via Sugarcraft
Ingredients
1 1/2 cups sugar
1/2 cup unsalted butter
1/2 cup milk
pinch of salt
3/4 c Biscoff spread (I find that about 1/2 the container works nicely)
2 tsp vanilla extract
3 cups quick cooking oats (plus a little more to adjust consistency if needed)
In a large saucepan, begin melting the butter and add in sugar, milk and salt. Heat until a rolling boil is reached, and then boil for one more minute. Take off the heat and then add in Biscoff and vanilla. Stir to completely combine, and then add in the oats. If mixture is too runny, add in extra oats. Drop tablespoonfuls onto a lined baking sheet (parchment paper works best for me) and place in the fridge until solid, usually within an hour or two. These cookies won't spread as they cool, so put them as close together as you need to on the baking sheets.
June 17, 2013
Dinosaurs, Power Rangers and Superheroes..oh my!
A few months ago, my baby turned 5. I have no idea how this happened, because I could swear it was only yesterday that he was learning to walk. I blinked and he's learning to read.
The thing about turning 5 is that you REALLY care about your birthday party. Last year we threw together a quick Star Wars party by making some pool noodle light sabers and cupcakes and we were good. This year though, the birthday was the talk of the family for months. The theme! The cake! The venue! Piñata or no piñata? There were days that I spent more time discussing the merits of various Power Rangers as cake toppers than I did on our wedding!
In the end he couldn't decide on a theme. We narrowed it down to the dinosaurs, Power Rangers and Superheroes. He requested a chocolate cake. After that I had to cut him off until the day before the party and then he could decide what he wanted on the cake. As you can see from the picture he chose dinosaurs. (Stegosaurus, of course!) I could swear that there was no persuasion on my part, but I was dino-crazy as a kid and I'm having waaaaaay too much fun being dino-crazy as a Mom to not try to sway him :)
The cake itself is one of my standbys. It's a slightly adapted version of one of the Barefoot Contessa's chocolate layer cakes. I chose not to use the frosting she recommends and instead went for a creamy chocolate buttercream from Joy the Baker. Neither recipe is overcomplicated, and the taste of the chocolate shines through. Don't be off-put by the coffee in the cake recipe. I usually use decaf in case anyone is avoiding caffeine but don't worry that it will taste like coffee. It just greatly enhances the flavor of the chocolate. You won't notice that it is there, but you will notice if it's not.
This is a worthy party cake, but not one that is too fancy for a casual get-together. Don't wait too long to try it!
Chocolate Cake
slightly adapted from The Barefoot Contessa
Ingredients
1 3/4 cups all-purpose flour
2 cups sugar
3/4 cups cocoa powder
2 tsp baking soda
1 tsp baking powder
1 tsp salt
1 cup buttermilk
1/2 cup vegetable oil
2 eggs, room temperature
1 tsp vanilla extract
1 cup hot coffee (I used decaf coffee but use whatever you prefer)
Preheat oven to 350 degres and prep two 8 inch round cake pans. Either butter the pans and then flour, or use a non-stick cooking spray (I like Baker's Joy)
Sift flour, sugar, cocoa powder, baking soda, baking powder and salt together and pour into the bowl of a stand mixer. Using the paddle attachment mix slowly until they are all combined. In a separate bowl, stir together all the liquid ingredients except for the coffee.
Slowly pour the bowl of wet ingredients into the dry in the mixer and mix on low speed to combine. Pour the coffee in and use a spatula to stir together.
Divide the batter between the two pans and bake for 35-40 minutes, until a tester comes out clean.
Cool in the pan for 20-30 minutes and then finish cooling on a rack. Wait until completely cool before frosting.
Chocolate Buttercream frosting
slightly adapted from the Joy the Baker Cookbook
3/4 c unsalted butter (1 1/2 sticks), room temperature
1/2 unsweetened cocoa powder
1/2 tsp salt
3 c powdered sugar
2 tbsp milk
1 tsp vanilla extract
1/2 c heavy cream
1/3 Ovaltine powder
Using the stand mixer with a paddle attachment again, cream the butter, cocoa powder and salt together. Add in the powdered sugar and scrape down the sides before mixing on low. Immediately add in the milk and vanilla. Keep beating at a medium speed until it's smooth, stopping to scrape the sides as needed.
In a small bowl, whisk together the cream and Ovaltine. Pour into the mixer (still on medium speed) and mix until smooth. If the consistency is too thick or thin, adjust it by adding more milk or more powdered sugar until it's what you are looking for. Chill in the fridge for 20-30 minutes before frosting.
To assemble the cake:
Place one cake on the cake stand and frost the top. Place the second cake on top of it. Using an offset spatula, frost a very thin layer around the entire cake (this is called the crumb layer and it will keep the crumbs from showing through the main layer of frosting). Proceed in the same way to do a thicker layer of frosting over the whole cake. I prefer to make this cake a little bit messy looking, rather than aiming for a totally smooth look, but it's really your preference.
June 11, 2013
Molasses Cream Sandwich Cookies
I know, I know. Molasses cookies in the summer? (And yes I also know that it's not "officially" summer yet, but it's 103 today in Oklahoma so it counts. Man I miss New England sometimes!) So while molasses does have a more autumn tone to it's flavor I think it's good to eat something with a bite to it in the midst of all the light summer fare.
These are the cookies my Nana made for us when I was little. It was probably the only time we used molasses growing up, and the only reason I had it in my pantry for years as an adult. It wasn't until I really taught myself how to cook a few years ago that I began to appreciate the flavor in other recipes.
I decided to mix things up a little and since I had buttercream frosting laying around from a preschool class project, I thought sandwich cookies might be fun. Anything with frosting in the middle is automatically a win in my boys' book, and what mom can resist that?
The sweetness of the buttercream sets off the bite of the molasses really well. They don't compete like two disparate flavors can when combined, but set each other off to perfect advantage. There's a reason the original was a family classic, and I'm thinking the updated version might be here for good too.
Nana's Molasses Cookies (about 3 dozen)
1 cup butter, softened
1 cup sugar (plus 1/2 cup for rolling cookies in)
2 tbsp molasses
1 egg
2 cups flour
1 tsp baking soda
1 tsp ginger
1 tsp cinnamon
1 tsp clove
1 tsp salt
Cream the butter and sugar together in a stand mixer. Add in Molasses and then the egg, making sure they are completely combined.
In a separate bowl, whisk together flour, baking soda, ginger, cinnamon, clove and salt.
Pour flour mixture into wet ingredients and stir to combine.
Roll tablespoon of dough into balls. Roll dough balls in sugar and place on cookie sheet. Flatten each cookie with a glass.
Bake at 350 degrees for 10 - 20 minutes.
Classic Buttercream Frosting
3 cups powdered sugar (sifted)
1 cup butter, at room temperature
1 tsp vanilla extract
2-3 tablespoons heavy cream
In a stand mixer fitted with whisk attachment mix sugar and butter together. When combined, add in the vanilla and raise the speed of the mixer so that the mixture is being whipped. Drizzle in cream until the consistency you want is reached and then continue to whip for another minute or two until the mixture is really fluffy.
Assembly:
Spoon about 2 tablespoons of buttercream frosting between two cookies and press together.
May 22, 2013
Strawberry Rhubarb Crisp
Every spring growing up, my grandmother's garden exploded with rhubarb. She would put it in a pie or a cake, and we'd hang out at her kitchen table talking. I always find it fascinating how certain people in my life are so associated with certain foods in my head. For Grandma, it's rhubarb, lemon cake and marshmallows (she used to keep a container in one cabinet in the kitchen and sneak them to me). For my Nana, it's an ice cream concoction she used to make me called "puddy-pandy" and molasses cookies. I never can replicate any of these in my kitchen so they taste as good as they do in my memory. Even the grilled cheese and tomato soup I ate with my Dad isn't quite the same.
Last summer when I visited my Grandma, I asked for her rhubarb recipes. I'm still trying to perfect them...they just aren't perfect yet. As she once told me when I complained about it-she's been making them for so long she doesn't even need the recipe-all I need is practice!
This recipe, though, is inspired by those days in the kitchen and it's pretty fabulous even without years of practice. It takes two of the first signs of spring and covers them in a thick crumb topping. You get just the right combination of sweet and tart fruit with crumbly crust. If I was given the chance I could eat the entire thing myself. I make sure I don't give myself that opportunity! This is perfect for those easy summer afternoons where you just want to sit around outside after dinner and let the kids stay up late. I'm hoping for lots of those nights this summer.
Good thing I have a stash of flash frozen rhubarb ready for it.
Strawberry Rhubarb Crisp
slightly adapted from Smitten Kitchen
For the topping:
1 1/3 c flour
6 tbsp sugar
1 stick butter, melted
zest of a lemon
For the filling:
1 1/2 c rhubarb, chopped
1 pint strawberries, chopped
1/2 c sugar
juice of a lemon
2-3 tbsp cleargel (or 3 tbsp cornstarch)
Preheat oven to 375F.
Mix all the ingredients for the filling together and pour in the bottom of a baking dish or pie pan. Set aside.
Combine the dry topping ingredients together and then add the melted butter. Mix with a fork or your fingers until everything is crumbly.
Pour topping over the filling until evenly covered. Bake for 40-45 minutes.
Serve warm or cold.
March 21, 2013
Chocolate Pound Cake
It's spring break for my boys this week which means I am knee deep in power ranger battles and the near constant discussion of birthday plans for my almost 5 year old.
First we were planning a Power Ranger party...then it was dinosaur week at school last week and it had to be a Power Ranger AND dinosaur party. I love dinosaur week because I desperately wanted to be a paleontologist when I was 7 (still do, to be honest) so we read lots of dinosaur stories and went to the Natural History Museum in Norman, OK last weekend. A few goofy pictures in front of fossils later and now I'm planning a dinosaur party!
This cake was not in the running for the birthday cake since it's a pound cake. Instead I was made it to drop off for a friend but when we tried it I knew I had to make this again and soon! I'm pretty sure it's going on the menu as an extra dessert at the party no matter what.
It's got a deep chocolate flavor, with the extra hit of melty chocolate sprinkled throughout by the chocolate chips. It's not too rich that you can't finish a slice, and I think it would be amazing with a mint flavored whipped cream. This would have been a perfect St. Patrick's day dessert...darn it, I was off by a week! I'm still getting used to blogging about food for upcoming holidays rather than what I made for the holiday. Let's just consider this planning ahead for next year, shall we?
Chocolate Pound Cake
adapted from A Dash of Sass originally Dorie Greenspan's Cocoa Pound Cake.
1 2/3 cup all purpose flour
1/2 cup dutch process or unsweetened cocoa powder
1 tsp baking powder
1/4 tsp salt
2 sticks unsalted butter, room temp
1 cup sugar
4 eggs, room temp
1 tsp vanilla extract
1/2 cup chocolate chips plus a teaspoon more for sprinkling on top
Preheat over to 325 and prep a loaf pan by spraying with non-stick spray.
Whisk together dry ingredients: flour, cocoa powder, baking powder and salt.
In a stand mixer, combine the butter and sugar together. Add the eggs one at a time, making sure they are completely mixed together before adding the next one. Scrape the sides of the bowl down and add in the vanilla. Add in the dry ingredients in two batches, and mix until it's almost all combined. Fold in the remaining flour and the chocolate chips.
Pour batter into pan and sprinkle a teaspoon or two of chocolate chips down the center of the loaf. Bake for 65-70 minutes, checking at 45 minutes to see if the top is browning too much. If it is, just place a foil tent over it for the remaining time.
Cool for a few minutes in the pan and then let it finish on a cooling rack. Enjoy right out of the oven or after it cools.
February 14, 2013
Butterscotch Chip Cookies
Some nights after the boys are in bed I want nothing more than to veg on the couch and watch some trainwreck reality tv. Other nights I might have a little more brain power but not much more oomph and you'll see me knitting and watching whatever PBS shows are stacked up in our DVR. (Hello, Shakespeare Uncovered. I'm obsessed.) But there are other nights where I just need to get in the kitchen. Cooking, and especially baking, are a total stress relief for me. Even when I'm making a difficult recipe and don't look like I'm enjoying it at all, I am. It's the intellectual challenge of trying something new. If it's a success, I like to tinker with it to see what it would taste like if I try this method or a slight ingredient change. If it's a complete failure, I want to figure out what went wrong and what I can fix (after a bit of swearing and grumping, let's be honest).
I stumbled on the original recipe for these cookies on Pinterest ages ago. It's one of those small batch recipes that made only 2 chocolate chip cookies. I was in a mood to bake, craving something sweet and just needing 10 or 15 minutes of zen in kitchen. This recipe only required one bowl, and I had everything to make them with except chocolate chips. After digging through my chocolate stash I found a bag of butterscotch chips languishing on the bottom. I know there was a recipe I bought them for, but it never got made, so I though, why not? I decreased the amount of chips because the butterscotch is so much richer than a simple chocolate. The result stopped us cold. The husband and I devoured these in approximately 15 seconds. They are just the perfect mix of gooey middle and melting butterscotch. Luckily the original recipe made 4 cookies instead of the expected 2. A few weeks later we tried it with chocolate chips. Excellent, but just not the same. I tweaked the recipe slightly, and expanded it make around a dozen. This is the kind of cookie you can heat up in the microwave a few days later and have it taste like it just came out of the oven.
I made the dozen to take to a friend this afternoon, but somehow she only got 10.
Butterscotch Chip Cookies
adapted from No. 2 Pencil
6 Tbsp butter, softened
6 Tbsp packed brown sugar
3 Tbsp granulated sugar
1/2 tsp salt
3 egg yolks
3/4 tsp vanilla extract
3/4 c flour
3/4 tsp baking soda
4 Tbsp butterscotch chips
Preheat oven to 350.
Put softened butter into medium bowl and then add sugars, salt and vanilla. Stir until combined and then mix in egg yolks. Add baking soda and flour and combine. Finally, fold in the butterscotch chips, taking care that they are evenly distributed throughout the batter.
Drop by the teaspoonful onto a baking sheet lined with parchment paper. The cookies will spread, so leave adequate space in between.
Bake for 10 minutes.
When you take the baking sheet out of the oven, bang it down on the counter top. This flattens the cookies, and gives them that sunken, wrinkled look.
February 5, 2013
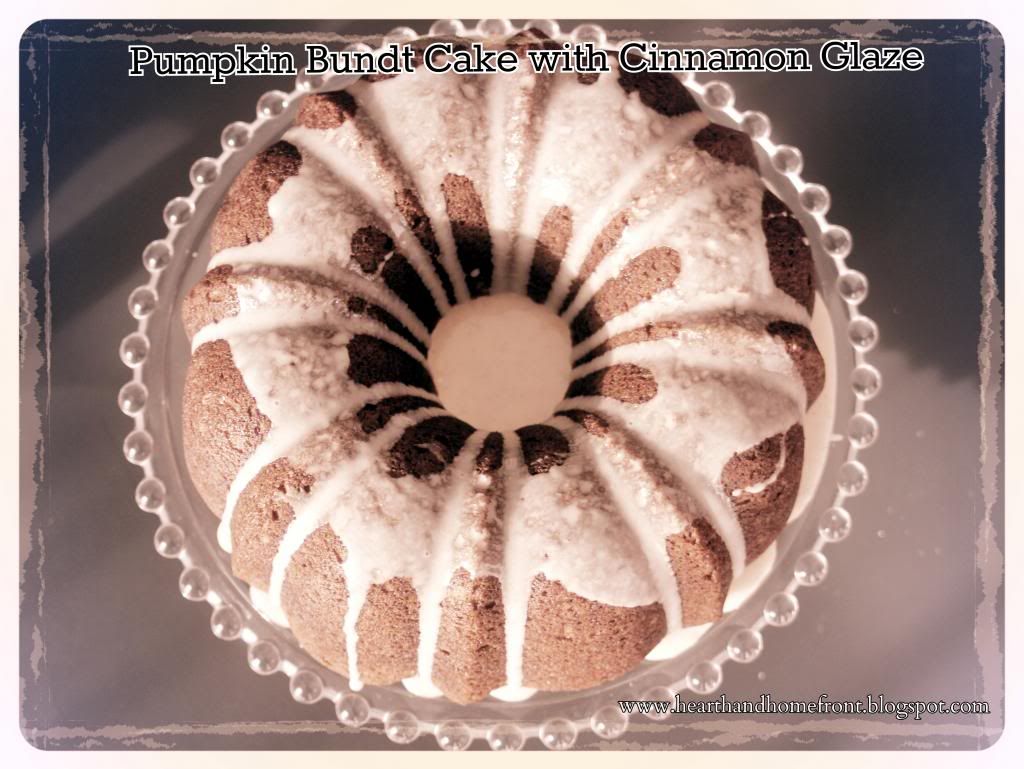
Pumpkin Bundt Cake with Cinnamon Glaze
Who watched the Super Bowl? We got together with a few friends to eat and watch the game. While I don't dislike the typical "football party" foods, I don't get as excited preparing them as I do the dessert. It was basically the same thing I felt about the teams in the game this year. We have lived near both teams, and in fact the only NFL game I have ever been to was in the Ravens stadium, but I didn't particularly care who won. I was just looking forward to relaxing, watching (hopefully) funny commercials and eating this cake.
I know that it's February, so I should be posting red and pink desserts like any self-respecting food blogger, but we have plenty of time for that before Valentine's day. For today, just put those pink frosted cookies to the side and remember how good pumpkin tastes. This recipe is from the Joy the Baker Cookbook. Joy is one of the food blogs I have been reading the longest, and I still look forward to reading her posts every day. I hope that several years down the road I'll still be writing things people want to read...even if it's just my family reading.
This is one of those cookbooks where I dogeared at least half of the recipes on my first read-through and every single one that I have made has been a hit.
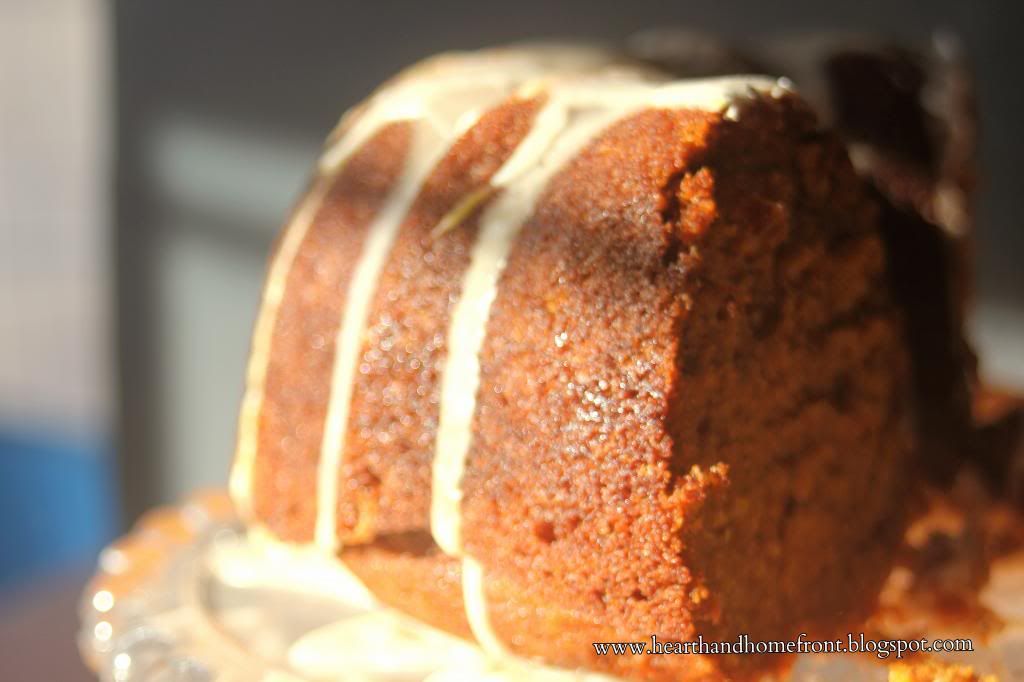
The cake feels like a slightly fancier version of pumpkin bread. It's not quite as dense, but has that nice earthy quality that satiates you and doesn't make you feel horribly guilty about what you've just eaten. Thanks to the pumpkin it also keeps beautifully. That is if you have any left to keep.
I made the cinnamon glaze thinner than in the original recipe, because I didn't want it to feel like a thick frosting. I used milk instead of the heavy cream and it created just the effect I was looking for. If you'd prefer a thicker glaze that doesn't drizzle, use the original heavy cream and add it in slowly until you get the consistency that you want.
Pumpkin Bundt Cake with Cinnamon Glaze
barely adapted from Joy the Baker CookbookCake:
2 c sugar
2 c flour
2 tsp baking powder
2 tsp baking soda
1/4 tsp salt
2 tsp cinnamon
1/2 tsp ground cloves
1/2 tsp ground nutmeg
1/2 tsp ground ginger
1 c vegetable oil
1/4 c buttermilk
1 tsp vanilla extract
1 15 oz can pumpkin puree
4 eggs
Glaze
2 1/2 c powdered sugar
1 tsp cinnamon
6 tbsp milk (or heavy cream if you want a thicker consistency)
Preheat oven to 350 degrees. Spray a bundt pan with nonstick spray.
For the cake, add the dry ingredients (sugar to ginger on the ingredients list above) to a large bowl and whisk together. In another bowl whisk the liquids together, and then add the eggs in one at a time. Pour the wet ingredients into the mix of dry ingredients and fold together.
Pour into the bundt pan and bake for 1 hour or until a tester comes out clean. Let cool in the pan for 20-30 minutes and then turn over and carefully place the cake on a plate to finish cooling.
For the glaze, whisk sugar and cinnamon together and then slowly pour in the milk until the mixture is at the consistency you desire. When cake is completely cool, pour the glaze over the cake and serve.
February 1, 2013
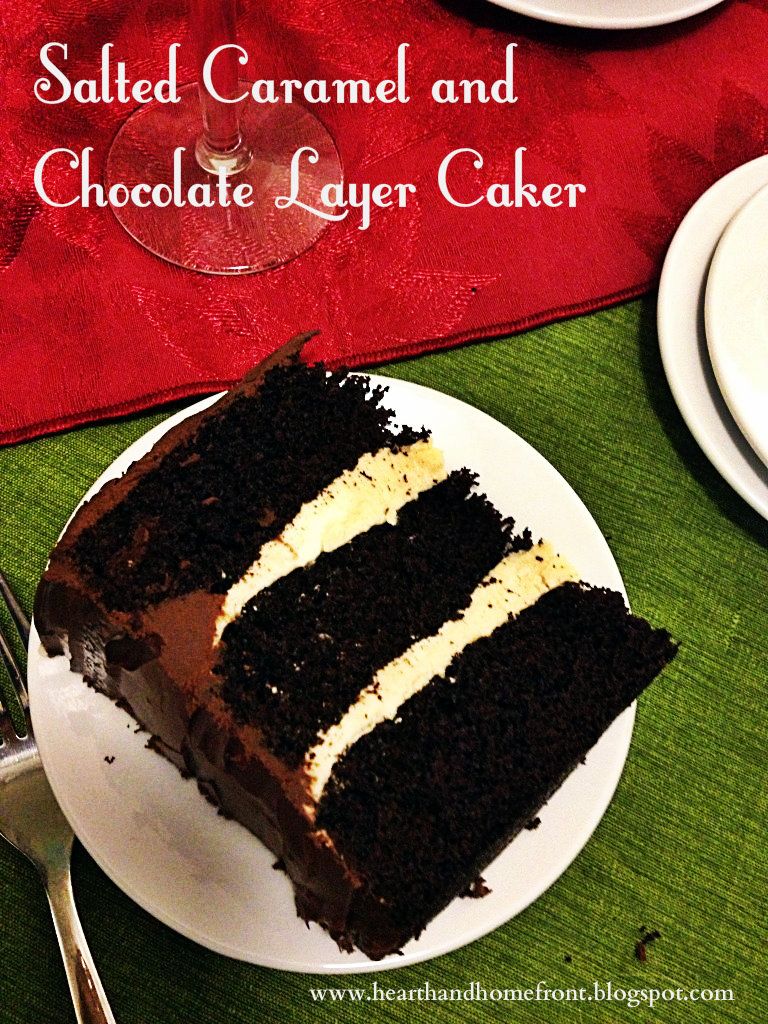
Salted Caramel and Chocolate Layer Cake
This is an occasion cake. It deserves pomp and circumstance and at least a few people to ooh and ahh as you cut into it. I've been waiting for an excuse to make it ever since I saw it on Annie's Eats last year and when I was put in charge of dessert on Christmas day I knew exactly what I was making.
You begin with a dark chocolate cake that is delicate and tender. Layer it with a lightly salted caramel buttercream and then cover the whole thing with a dark chocolate frosting. It's rich, yes, but so worth it.
The original recipe uses homemade caramel sauce to add into the swiss meringue buttercream and while delicious done that way, this time I used a store-bought caramel sauce (like this one from Trader Joe's found on Amazon). To cut down on the prep time and difficulty level, I changed the recipe to include that. If you prefer homemade, Annie will walk you through it.
Start thinking of an occasion. This cake is worth it.
Salted Caramel and Chocolate Layer Cake
adapted from Annie's Eats
For the cake:
2 1/4 c. flour
2 1/4 c. sugar
1 c plus 2 tbsp unsweetened cocoa powder
2 1/4 tsp baking soda
1 1/2 tsp baking powder
1 1/2 tsp salt
6 tbsp vegetable oil
1 c plus 2 tbsp buttermilk
1 c plus 2 1tbsp brewed coffee
3 eggs at room temperature
1 tbsp. vanilla extract
For the filling:
1/4 c salted caramel sauce (or add a large pinch of fluer de del to plain caramel sauce)
1/4 c plus 2 tbsp sugar
4 egg whites
1 1/2 c unsalted butter, room temperature
For the frosting:
12 oz semisweet chocolate, chopped
1/4 c unsweetened cocoa powder
1/4 c hot water
1 c plus 2 tbsp unsalted butter at room temperature
1/3 c plus 1 tbsp confectioners' sugar
pinch of salt
Fleur de sel, for sprinkling on top
For the cake:
Preheat the oven to 350 degrees. Grease three 8-inch round cake pans. Using an electric mixer on low, mix flour, cocoa powder, baking soda, baking powder and salt. Pour in the liquids (vegetable oil, buttermilk, coffee, eggs, vanilla) and combine completely. Split the batter evenly between the three pans and bake at 350 for 20-25 minutes, when a tester in the center comes out clean. Cool in pan for 15 minutes and then turn out onto a cooling rack to finish cooling.
For the filling:
Pour egg whites and sugar into a heatproof bowl (metal or glass) on top of a pan of simmering water. Whisk while it heats until the sugar is dissolved and the liquid reaches 160 degrees. Pour liquid into the bowl of a stand mixer and whisk at medium speed until stiff peaks appear and the mixture is cool. (Annie said this would be about 8 minutes, but it was closer to 10-12 for me) Add butter two tablespoons at a time until thoroughly combined. If it looks curdled DON'T WORRY. Just keep mixing until it is smooth again. Despite warnings I was sure I had ruined it but after a few minutes of mixing it came together smoothly again. Once fluffy and smooth, pour in the caramel sauce and mix together.
For the frosting:
Melt the chocolate in a heatproof bowl over simmering water. Once smooth set aside and let cool. In a bowl, stir together the cocoa powder and hot water. Add the butter, confectioners' sugar and salt into the bowl of your stand mixer and mix on medium speed. Add in the melted chocolate until thoroughly combined and then the cocoa mixture and mix until smooth.
To assemble the cake:
Level any of the cake layers that need it. Place one layer on the plate or platter you will serve it on. Top this layer with half of the buttercream and smooth. Place the second cake on top of this and cover that with buttercream as well. Put the last cake on top of that layer of buttercream. Using the chocolate frosting, cover the sides and top and create a smooth finish with an offset spatula. Sprinkle fleur de sel around the outside edge of the top of the cake.
Subscribe to:
Posts (Atom)


